Thursday, May 6, 2010

Fresh Mussels steamed in dark Beer


Where we live, in between Johannesburg and Pretoria and hundreds of kms from the sea, it's quit difficult to find fresh mussels. It's a pitty, because I really do LOVE them and NEED them. We have eaten them once in a restaurant on 4th Avenue in Joburg. Two weeks ago at the Food Lovers Market here in Centurion I found them and I was over the moon. I bought the whole batch and took the little darlings home. Later on I found out that Bazaruto fishmarket sells them on order, but you have to take 5 kg, so I'm thinking of ordering 10 kg and throwing a big mussel party for all my mussel loving friends very soon!! If you can't find live mussels, forget about the whole thing (please don't even try, it will be a very big dissapointment), frozen mussels are not an option: they are dead and therefore rubbery and chewy.
You will need about 3/4 to1 kg fresh mussels per person. The shells have to be closed, or close when you tap them. Throw away open or broken shells. Wash them under running water, take the barnacles attached to the shells off with a sharp knife, as well as the beards (hairy dark green stuff), that might still be on some of them. 
One tip if you are still in the process of trying to like mussels: do not open and have a look inside the mussel itself, it will probably put you off eating it... Not my 5 year old girl however, she is attracted to the strangest looking food and will eat or at least try anything!

Serves 4 (main course):
- 3 kg - 4 kg live mussels
- 1 tbsp olive oil- 1 onion, finely chopped
- handful of flatleaf parsley, finely chopped
- 1 stalk celery, finely chopped
- 1 (0.33 l) bottle of dark (Belgian) beer
- 2 cups water
- salt and pepper to taste  

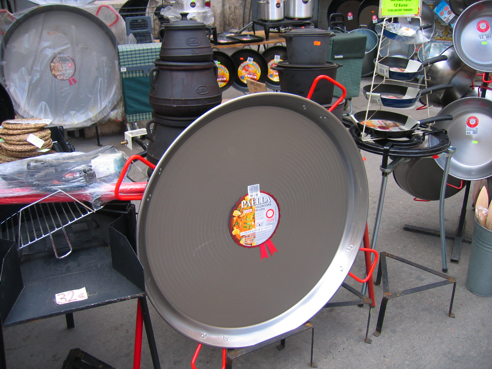
In a musselpan (or just a high, big, not to heavy pan with a lid) saute onion for a minute in a splash of olive oil or butter. Add mussels, beer, water, parsley and celery and boil/steam for a few minutes, until all the shells have opened (shake the pan a few times to check this). As soon as the shells are open, serve in the pan with frieten (fries) or crusty bread and some dipsauces (mayonaise garlic dip, chutney curry dip, herb dip, etc). Don't forget to eat the delicious beer soup you will end up with! (Afterwards, you can save the soup, reduce it to 1/3 and, with a little cream, turn it in to a delicious pasta sauce!)  

Tuesday, April 27, 2010

Gazpacho (Cold Spanish Vegetable Soup)


This refreshing cold soup is very easy to make. Also a good option to make a day in advance.
Serves 4:
- 6 tomatoes
- 1 big cucumber
- 1 big red pepper
- 1/2 onion
- 1 clove garlic
- 1 stalk celery
- 2 tbsp extra virgin olive oil
- 2 tbsp wine vinegar
- 1/2 red chili, deseeded and chopped
- 1 cup water
- salt
- pepper

Put all the ingredients except salt and pepper in a blender (you may need to do this in batches if you use a hand blender) and process until smooth. Season and refrigerate for at least an hour. Serve cold with chopped pepper, onion, celery, tomato, cucumber (or just one of these) and garlic croutons.

For the garlic croutons: cut some white bread into small chunks, sprinkle with olive oil, chopped garlic, parsley and salt. Fry the pieces of bread over medium heat in a dry pan until golden and crispy (stir continuously to prevent burning!). Serve immediately or let cool down and keep in an airtight container.

Monday, April 26, 2010

Thai Fish Cakes with Sweet and Sour Dipping sauce


This recipe may not be the quickest, but it is quit easy and really one of the best things you can do with a piece of white fish. Serve them as a side dish, a snack or as a starter. When we were living in Tehran we used to do a curry night every month. We would have to bring our own drinks (because alcohol is VERY expensive and illegal in Iran: a 0,75 l bottle of mediocre wine like our beloved Bulgarian Francois du Lac -the only reason we drank it, because it was the ONLY wine being smuggled into the country- would cost at least $30) and a curry and the host would take care of the rest. The first time I decided to make these fish cakes and they were such a big hit, that by popular demand I had to bring them every single time we had a curry club!
Because these cakes burst with flavour, use a simple, not too expensive, big white fish. Look for a fish with flaky flesh (like cod, the flesh of some of the smaller fishes tend to fall apart when you start frying the cakes).

Makes about 25 fishcakes:
- 800 g white fish fillet
- 1 heaped tbsp Thai red curry paste (recipe here, or take your favourite brand)
- 20 spring onions, chopped roughly
- 1 handful coriander, chopped
- 2 eggs
- 1/2 l milk
- 3 tbsp fish sauce
- oil for frying

Dipping sauce:
- 1 cup sugar
- 1 cup vinegar
- 1 cup water
- 1 tbsp fish sauce
- 1 tbsp coriander, chopped
- 1 chili, chopped
- 1 tbsp mint, chopped
- 1 clove garlic, chopped

Start with the dip, because it has to cool down before serving.
Bring sugar, water and vinegar to a boil and keep stirring every now and then and check the thickness of the liquid regularly. Reduce it this way to a thin syrup (about 1/3 of the amount you started with). Before you take your syrup off the hob, taste and add a little more vinegar or sugar to taste. When your syrup has the right thickness remove it from the heat and let it cool down (it will get a bit thicker in the process of cooling).
Stir in coriander, chili, garlic, mint and fish sauce.

For the fishcakes, check the fish for bones and remove them. Cut the fish into chunks and put them in a blender with the eggs, red curry paste, fish sauce and milk. Process it roughly to obtain a thick paste. Over processing will make the fish rubbery. With a spoon, mix in the spring onions and the coriander.
Heat some oil in a frying pan and scoop one full tablespoon of the mixture on a spoon. Drop it in the pan using another spoon and spread so you end up with four or five small (not to thick) patties. Cook until brown, turn and repeat on the other side.
Lift them out of the pan and put them on a piece of paper kitchen towel. With another kitchen towel pat the oil off.
Keep warm in the oven until all the cakes are ready and serve with the dipping sauce. The cakes are not spicy, the dipping sauce is, so if you have small kids that are joining you for a Thai meal, make the dipping sauce without the chili. The fishcakes are best eaten immediately, but if you plan to make them for a party in advance, just reheat them in the oven or microwave.

Thai Red Curry Paste

For Thai Red Curry Paste, pound the following together using a pestle and mortar to obtain a smooth paste:

- 5 whole red chilies, chopped
- 5 shallots, chopped
- 10 cloves garlic
- 1 tbsp oil
- 1 tbsp galangal, chopped
- 1 tbsp lemon grass, chopped
- 6 lime leaves, finely chopped
- 1 tbsp chopped fresh coriander root
- 5 black peppercorns
- 1 tbsp ground roasted coriander seeds
- 1 tsp roasted cumin seeds
- 1 tsp sea salt
- 1 tsp shrimp paste

Thursday, April 22, 2010

Herby Quinoa and Plum Salad

Quinoa is a nutty flavoured seed from the South American Andes and it has been used for over 6000 years. I use quinoa in this recipe, but it can easily be replaced by bulgur wheat or couscous. The herbs, plums and dressing in this fresh and healthy salad go really well together.


Serves 4:
Salad:
- 250 g quinoa
- 2 cups water
- 1 small onion, finely chopped
- 1 garlic clove, finely chopped
- 3 tbsp olive oil
- 6 tbsp lemon juice
- handful of parsley, finely chopped
- handful of mint, finely chopped
- 10 plums, depitted and cut in 4
- salt
- pepper

Yoghurt dressing:
- 150 ml yoghurt
- squeeze of ketchup
- chives, finely chopped
- 1 small clove of garlic, finely chopped
- 1/2 teaspoon chili powder 

Soak the quinoa for about an hour and resoak or rinse it very well under running water while rubbing it with your fingers to get rid of the natural bitter soapy coating (saponin). Drain. 
In a pan with the water bring it to a boil, cover with a lid and simmer for 12-15 minutes. Remove from heat and allow to sit for 5 minutes with the lid still on. Fluff with a fork and let cool for 30 minutes, then transfer to a salad bowl.
Mix in the onion, garlic, parsley, mint, oil and lemon juice.
Season with salt and pepper.
Add the plum wedges and refrigerate for at least half an hour.
Mix the ingredients for the yoghurt dressing in a small bowl.
Serve the salad piled up on a big serving plate with the dressing in a little bowl on the side.

Wednesday, April 21, 2010

Home grown Seed Sprouts


Sprouting is great. Sprouting seeds at home is easy, cheap and healthy.
Most unprocessed seeds, pulses, grains, or nuts can be sprouted, but some are easier than others to sprout (avoid kidney beans, these are toxic). Be sure to use (preferably organic) seeds that are meant for consumption, not for planting as the latter can be chemically treated. Pulses, grains and nuts need soaking, seeds sprout easily without soaking them first. Bean sprouts need to be cooked before you can eat them, the rest can be eaten raw. About a year ago I found a seed sprouter that works really well for me, but you can use a big jar with some cheese cloth or nylon to cover it instead. In my sprouter, because it has three trays, I can grow three different sorts of sprouts at a time. 

The easiest one to sprout is alfalfa. Just put a tablespoon of seeds in one of the sprouting trays and pour a cup of water over it two or three times a day. Within two or three days you will notice that the seeds will start sprouting. Continue watering it for a few more days and your alfalfa sprouts are ready to eat, for example on a whole wheat sandwich with tomato. Other sprouts can be used in salads or stir-fries.

Tips: 
- for soaking, see this soak chart
- don't use too many seeds/pulses, nuts at a time (covering half of the surface of the tray is enough)
- after watering, give the sprouter trays a tap, to get rid of the excess water 
- if you see mold or mildew, discard the batch, clean the sprouting tray well and start over
Sprouts I have been able to grow: alfalfa (never fails), mung beans, fenugreek, barley, flax seed, adzuki beans
More challenging sprouts I'm still trying to grow:  mustard seed, Japanese radish, quinoa, celery

Monday, April 12, 2010

Mixed Paella


Paella, which has its origins in Valencia, is a very grateful dish. I really enjoy preparing it, serving it and eating it. You can make it with whatever you like (rabbit, chicken, shellfish, sausage, frogs or snails). Served in a big paella pan it looks and smells fabulous and it's a great dish to dig in with the whole family. There are many different types of paella, but this one has everything I like in it.

Serves 6
- good splash of olive oil
- 1 onion, finely chopped
- 3 cloves garlic, finely chopped
- 600 g semi-long grain rice or short grain rice (like risotto rice)
- about 0,8 l stock
- 6 chicken drumsticks
- 1 red pepper, chopped
- 1-2 g saffron
- 1 small and thin dry sausage like a dry salami, cut in thick coin sized slices
- 2 tomatoes, deseeded and chopped- 2 handfuls of peas (frozen will do)
- (15 mussels)
- 12-15 big prawns
- handful of parsley, finely chopped
- pepper, salt
- 1 lemon, cut in wedges


If possible use a big paella pan. This is a wide, shallow, thin base pan. If you don't have a paella pan, just use a big frying pan or a wok.
Start with sauteing onions and garlic on medium heat in some olive oil. When translucent add chopped red pepper and rice and stir until it's coated with oil.
Add some ladlesful of stock and stir. Let it come to a gentle boil and when all the fluid has been absorbed, add some more stock.
Roast your saffron in a dry hot pan. Then crumble it in the rice an stir.
In the meantime fry the seasoned chicken in a separate pan and keep warm (in some aluminum foil or on low heat in the oven) when crispy.
When the rice is close to being "al dente" add the sausage.
Fry the seasoned prawns in some olive oil.
Cook the mussels in their shells.
A few minutes before serving, add peas and tomato.
Taste and, if necessary, season with salt and pepper.
A few minutes later stir in tomato and peas.
Finish off with the chopped parsley.
Arrange drum sticks, prawns, mussels and lemon on top of the rice and serve. 

Saturday, April 10, 2010

Melktert (South African Custard Tart)

I love to cook, but I’m definitely not a baker. I find baking a very messy and sticky activity and I’m not really into cakes/tarts. But this is actually a very nice one! So… you will probably end up with a fairly messy kitchen after you finished making this delicious South African custard tart (so if you live in SA try to make it while your domestic worker is around, otherwise,... uhm, do your own dishes), but it is worth it. If you have a really sweet tooth, you can add some more sugar to the filling (some recipes call for 200 g of sugar), but I like it best when it’s not so sweet.


Serves 12
Base:
- 125 g butter
- 100 g sugar
- 1 egg
- 250 g cake flour
- 5 g baking powder
- pinch of salt

Filling:
 - 1 l milk
- 30 g butter
- 1 cinnamon stick
- 40 g cake flour
- 40 g corn flour
- pinch of salt
- 125 ml milk
- 100 g sugar
- 3 eggs
- 5 ml vanilla extract
- cinnamon for dusting

Base:
Preheat oven to 200 °C. Line the bottom of a tart mould with baking paper (or butter) and coat the sides with some butter.

Mix butter and sugar until creamy.
Blend in the egg and the rest of the base ingredients. Mix until you get a firm dough. Wrap in cling film and leave it to rest in the fridge for about half an hour.
Roll out the pastry on a lightly-floured surface and transfer gently to the tart mould. Prick all over with a fork. Transfer to oven and bake for about 15 minutes until crisp and golden. Remove from oven and allow to cool.

Filling:
In a pan, bring milk with butter and cinnamon stick over medium heat to a boil.
In the meantime, mix cake flour, corn flower salt and extra milk until smooth.
Ladle some of the hot milk mixture into the flour mixture, stir well and poor it back in the pan, while whisking. Let it come to a boil and simmer for 3 minutes.
Mix sugar and eggs and ladle some of the hot milk mixture into it, stir well poor back into the pan. Let it come to a boil while whisking. Add vanilla extract and stir. Let it cool down, while stirring once or twice.
Poor the filling into the base and refrigerate. Dust with cinnamon powder and serve.

Sunday, April 4, 2010

Cold Tomato and Pepper pasta Sauce

This sauce is one of the easiest and most successful pasta sauces and.... the next day you can serve the leftovers as a salad. The combination of hot pasta with this cold sauce with its cooked and raw elements is amazing. It's easy to make in advance, for a lot of people or to serve as side dish for a bbq. I still have to meet the first person that doesn't like this sauce/salad.

Serves 4-6:
- 1/2 kg cherry/plum tomatoes
- 2 red peppers
- 1/2 onion, finely copped
- 1 garlic clove, finely chopped
- 1 tsp sugar
- pinch of salt
- good splash of olive oil
- good splash of red wine vinegar
- (1/2 chili pepper, deseeded and finely chopped)
- handful Italian basil
- grated Parmesan


Cut the red peppers in half (better not use orange or yellow, because the skin doesn't come off as easily as the red pepper skins) and put them under the grill until they are blackened. Immediately, put them in a plastic bag (this will steam the skin off) until cooled down. When cooled, remove from bag (keep the liquid in a salad bowl), peel off the skin and cut into thin slices.
Put half the tomatoes under the grill until they start to burst open. You can roast the peppers and the tomatoes together at the same time, but the tomatoes will be ready much earlier than the peppers. Put them in the salad bowl.
While the tomatoes are still warm add onion, garlic, sugar, salt, vinegar and olive oil.
Add the pepper and the halved rest (the ungrilled part) of the tomatoes.
If you like it hot, add the chili.
Chill. (and put sauce in fridge)
Before serving, stir in the chopped basil.

Serve with (hot!) pasta and freshly shaved or grated Parmesan.

Thursday, April 1, 2010

White Asparagus with ham, egg and new potatoes


This dish is one of my all time favorites. Although it is not so much a recipe, more a combination of cooked items, it is definitely a great combination! In the Netherlands the season for Dutch white asparagus is starting soon (the season is roughly from half of April until half of June). I found them here in South Africa once or twice in November, but I have no idea where they came from. Anyway, they looked delicious and of course I had to prepare them our traditional way.

Serves 4:
- 1,5 kg white asparagus (thickest you can find!)
- 1 tsp sugar
- 6 eggs
- 400 g ham
- 1,5 kg new/baby potatoes, skin on
- a stick of butter, don't be shy
- salt 
- (grated nutmeg)

Ok, this is very easy. Peel the asparagus (with a special peeler), holding them flat on a cutting board (be careful not to break them) and cut about 1 cm off the end. Boil the strips of peel and the ends for 15 minutes in a pan with a liter of water with a bit of sugar and salt. Keep the asparagus in a bowl of cold water until needed.
Discard peel and ends, keep the liquid to boil the asparagus in.
Boil asparagus for 5 minutes in the asparagus liquid, remove from fire and leave them with the lid on the pan for about 15 to 20 minutes.
In the mean time, boil the potatoes in their skin for about 20 minutes, boil the eggs for 8 minutes, melt the butter on low heat in a pan and arrange cold ham slices in rolls on a plate.
Peel the eggs and arrange them on the plate with the ham.
Drain the asparagus and lay them on a plate with a cotton kitchen towel.
Serve with the potatoes, butter, salt and freshly grated nutmeg.

Sunday, March 28, 2010

Fragrant Corn soup with Lemon grass


This is a super sweet and creamy (no cream) corn soup with a delicate touch of lemongrass. Worth the try!

- 4 corncobs
- 1 liter milk
- 1/2 tbsp olive oil
- 1 onion, chopped
- 1 carrot, chopped
- 1 potato, peeled and chopped
- 1 celery stick, chopped
- 2 lemongrass stems cut in 3
- a few fresh thyme sprigs
- 3 bay leaves
- (1 tbsp butter)
- (chives)


Halve the cobs and cut the kernels from the cobs.
Bring cobs to a boil in a pan with milk. Remove from stove.
Saute onion, carrot, celery and potato in a splash of olive oil for about 3 minutes on medium heat.
Add corn kernels, thyme, lemongrass and bay leaves and saute for another 2 minutes.
Add milk plus cobs and simmer for 30 minutes.
Let it cool down, discard cobs, thyme, bay leaves and lemongrass and puree (with a tablespoon of butter, or without for the healthier version) in a blender. Add some water for a thinner soup.
Pass through a fine sieve and serve hot, sprinkled with chopped chives.

Saturday, March 27, 2010

Bitterballen / Kroketten, a very Dutch snack

This super Dutch bar snack is a delight for all. Surely not a healthy option, but sooooo good! You will find the bitterballen in most bars in the Netherlands and they make a great snack with a beer around five o'clock. The kroket is mostly eaten as lunch, on a soft bread roll. You will find them in fast food restaurants as well or in the also very Dutch "muur" (wall): some fast food restaurants have a heated wall with little windows you can open after putting some money in it. For both goes: don't forget the mustard!
So go ahead and wow your friends with this fantastic snack next time you throw a dinner party (and hire someone to deep-fry them for you a-la-minute...).

Makes about 20 kroketten or 60 bitterballen.

Filling:
- 50 g butter
- 50 g flour
- 1 cup of milk
- 1 small onion, finely chopped
- 1 clove of garlic, finely chopped
- 250 g (left over) cooked meat (chicken/veal/fillet of beef), finely chopped/shredded
- 1 handful of parsley, finely chopped
- 1 tsp nutmeg
- pepper and salt
- oil for deep frying
- mustard

for the coating:
- 1 cup flour, on a plate
- 2 eggs, lightly beaten with a splash of milk, on a plate
- 2 cups bread crumbs, on a plate


Melt butter in a saucepan.
Add onion and garlic and saute for 2 minutes, without browning.
Add flour and stir well for 2 minutes.
Add milk and keep on stirring until you end up with a smooth thick doughy sauce.
Add the meat and parsley and season with nutmeg, pepper and salt.
Let it cool down and put the mixture covered in the fridge for a couple of hours.
Form the mixture into 12 cm not too thick logs (kroketten) or into small ping pong sized balls (bitterballen).
(if they have "melted" a bit, put them in the freezer for about an hour, until they are firm again).

Roll each kroket or bitterbal through some flour first, then through the eggs and then trough the breadcrumbs. (Tip: to avoid extreme mess, do it in batches: start with rolling about ten of them in flour, then move over to the eggs and finish with the breadcrumbs).
Put them on a plate and cool them in the fridge or a couple of hours or in the freezer for an hour (or freeze them until you need them).

Heat frying oil in a heavy based pan to 180 °C and deep-fry the bitterballen in batches of eight or ten for about 4 minutes, kroketten in batches of six for about 6 minutes. Test the first one and be sure the centre is hot! (If you deep-fry frozen kroketten or bitterballen it will take a few minutes longer).

Serve the bitterballen with mustard (I prefer Dijon) and the kroketten on a white roll with mustard.
For a pescatarian version: take chopped prawns instead of meat, lemon zest and lemon juice in stead of nutmeg and add some dill! You could even make vegetarian ones with mushrooms.

Sunday, January 10, 2010

Mirza Ghassemi (Iranian Eggplant dish)


Being an eggplant lover, this is one of my favourite Persian dishes. Delaram, my neighbour in Niavaran in the north of Tehran used to make it for me.

- 2 medium eggplants
- 1 onions, chopped
- 8 cloves garlic, chopped
- 1 tbsp olive oil
- 1 tsp turmeric
- salt and pepper
- 3 tomatoes
- 4 eggs


Roast the eggplants under the grill until the skin is blackened. Cool and scoop the pulp out.
Saute onion and garlic in olive oil until golden brown.
Stir in the turmeric, eggplant pulp, pepper and salt.
Skin the tomatoes by cutting a cross in the skin and dipping them in boiling water until the skin starts to curl up. Cool immediately under running water. Peel, deseed and chop. Add them to the mixture. Let it simmer for 5 minutes.
Beat the eggs lightly and poor them over the mixtures. When the eggs solidify, stir into sauce.
Serve hot as a side dish.

Thursday, January 7, 2010

Slow roast Leg of Lamb with Rosemary, Sweet Cloves of Garlic, Anchovies and Lemon with a Vegetable Jus


- 1 leg of lamb, bone-in (about 2 kilo's, serves 6)
- 1 tin anchovies
- 1 salted lemon, chopped
- 1 handful of rosemary
- about 5 garlic cloves, peeled and halved
- 2 tbsp olive oil
- splash of water or wine
- pepper and salt
- 5 shallots or 2 onions
- 2 carrots
- 2 small potatoes, cut in four
- 2 celery sticks
- thyme
- handful of cherry tomatoes
- 1 tbsp honey

Before starting the preparation of your leg of lamb, let the meat come to room temperature first (this can take a couple of hours).
Make small but deep cuts with a knife and fill half of the pockets with some rosemary and garlic and the other half with anchovies and lemon. Just use your finger to push it inside and close the flesh afterwards. Rub your lamb with some olive oil and then with salt and pepper.
You need a casserole that is big enough for the whole leg. Add some olive oil to the casserole and, on the stove, brown the lamb all over. Take the leg out and saute the carrots, onions, celery and potatoes for a few minutes. Add thyme and a splash of white wine or water and put the lamb on top. Put the casserole with the lid on in a preheated oven (160 °C) and leave it there for four hours.
Half an hour before the dish is ready add some cherry tomatoes and honey and return to the oven for 30 minutes. Take casserole out of the oven en let the meat rest for about 15 minutes.
While the meat is resting, put the liquid (if there's a fatty layer on top, spoon it off first -I use my new very useful kitchen tool: the fat separator-) and the vegetables in a blender, puree and strain. The result is aromatic succulent piece of lamb and a light but creamy jus.

Wednesday, January 6, 2010

Spicy Pumpkin Soup


This is a super easy and healthy soup. I'm not really a pumpkin fan myself, but this soup is just delicious!
Serves 4:

- about 500 g pumpkin/squash, peeled, deseeded and cut in to chunks
- 1 zucchini (or 2 or 3 baby courgettes), roughly chopped
- 1 tsp olive oil
- 1 onion, chopped
- 1 cm of fresh ginger, peeled and finely chopped
- 1 tsp (hot) curry powder
- handful of fresh coriander
- ½ liter water or (vegetable) stock


Brown onion in a pan with some olive oil, add ginger and curry powder, saute for one or two minutes.
Add pumpkin and saute for two minutes more.
Add water or stock and bring to a boil. Let it simmer for about 20 minutes, or until the pumpkin is getting soft.
Add zucchini and simmer for five more minutes.
Turn stove off and let cool a bit, then add half of the coriander and puree in a blender. Serve hot, with some more fresh coriander (and a dollop of yoghurt).

Thursday, December 10, 2009

Bbqed king prawns


A couple of weeks ago, we invited some South-African friends over for a bbq (here: braai). South-Africans are very proud of their braai and their meat. South-Africans love meat, lots of meat. I decided to shock their system a bit with a fish braai and it went down very well! These prawns were a big hit. It's all about the marinade and the quality of the prawns. For this recipe you need some big, good quality prawns, the bigger the better.  

Serves 4 :

- 16 raw king or tiger prawns in their shells
- 3 cloves of garlic, finely chopped
- 2 tbsp bbq sauce (Heinz)
- 8 tbsp lemon juice
- 1 tbsp olive oil
- bunch of parsley, finely chopped
- 1/4 preserved salted lemons, finely chopped
- sea salt and pepper to taste


Mix all the ingredients except the prawns in a small bowl. Slice each prawn from just under the head to the tail right on the centre of its back. Remove the dark stringy vein that runs across the back, just under the shell and fill the opening with the marinade. Lay the stuffed prawns back up in a container and drizzle the rest of the marinade on top. Marinate for 2 hours or even overnight. Put the prawns on skewers (I use two skewers next to each other -so each prawn is pierced by two skewers- to prevent the prawns from rotating) and put them on the braai for a few minutes on each side. If you don't have a braai, using a grill is fine as well.

Wednesday, December 9, 2009

Refreshing summer X-mas punch (low GI, non-alcoholic)

This super refreshing punch is a mix of tea, fruit juices and spices. A friend of mine was (although she is slim with an active lifestyle) diagnosed with pre-diabetes 2 a couple of weeks ago. To avoid having to take medicine for diabetes, she is keeping a strict low GI diet. One of the things she served for her birthday tea recently was this beautiful, not sweet at all punch. It’s perfect for a hot summer X-mas day (like we have here in South Africa).

Makes 3 litres:
- 1 cup (250 ml) unsweetened orange juice
- 1 cup unsweetened (cloudy) apple juice
- 8 cups water (or more if you want to make it even less sweet)
- 2 cups unsweetened pineapple juice
- 4 rooibos teabags
- 3 sticks of cinnamon
- 10 cloves
- 1 cm fresh ginger root, grated

Bring water with spices and teabags to a boil. When it starts to boil, turn off the stove after one minute and let infuse and cool for about one hour. Pass through a sieve and mix in the juices. Refrigerate and serve cold.


Tuesday, December 8, 2009

Preserved salted lemons

Lemon and basil are just some of the beautiful ingredients I use frequently in my kitchen. Loving food and photography makes it easy to start a food blog, so everyone can enjoy the recipes and hopefully mouthwatering pictures of the food we love to eat at home.
I will kick off my food blog with these preserved lemons, because I'm using them all the time now! Really simple to make and makes a good gift too.

- an airtight glass jar 
- 5 (organic) lemons or limes (or more/less depending on the jar)
- course sea salt

Slice the lemons (or limes) lengthwise almost in half. Repeat and make a cross so you will end up with a lemon with four parts that are still attached at the bottom of the lemon. Open it a bit like the petals of a flower and generously sprinkle salt in between the parts. Close and put it in the jar. Repeat with the rest of the lemons and pack them tightly in the jar. If you have a lot of space in between you can even cut up a lemon, dip it in salt and squeeze it in between the whole lemons. The jar should be crammed with lemons. Add some extra lemon juice (up to about 1/3 of the jar). Now put the jar somewhere in the kitchen and wait. Wait and shake the jar every now and then.
After three weeks to one month the lemons will have released their juice and all the lemons will be soaking in the juice (if not -this depends on the juiciness of the lemon- add a bit of lemon juice). The peel is now soft and waxy and ready for use. You can use peel and flesh or only the peel. The juice can appear to be milky or to have milky strings in it, but that is fine. The lemons will last for at least a year.
Use some of it, (rinsed and) finely chopped, in hummus, soups, sauces, marinades, salads or to zing up a nice piece of fish or meat. The juice can be used in the same way.